
I know you didn’t buy a TGA Gamestick controller just to use half its features.
You want to know what every button does. How to connect it to different platforms. How to customize it the way you need.
Most controller guides give you the basics and call it a day. This one doesn’t do that.
I’m going to show you everything your TGA Gamestick controller can do. From the moment you pull it out of the box to the advanced settings most players never touch.
This is the official walkthrough. Everything in here comes straight from the people who designed the hardware you’re holding.
You’ll learn setup, button functions, how to connect across multiple platforms, and how to fix problems when they pop up.
No guessing. No trial and error.
Just clear steps that turn you into someone who actually knows their controller inside and out.
Unboxing and First-Time Setup
I’m going to be honest with you.
Most people skip the setup instructions and just plug things in. I used to do the same thing (until I bricked a $200 headset by ignoring the charging protocol).
So yeah, I learned my lesson.
When you crack open your tgagamestick box, you’ll find exactly what you need. Nothing more, nothing less. The TGA Gamestick Controller sits front and center. Underneath it you’ve got a USB-C charging cable, a 2.4GHz wireless dongle, and a quick start manual.
Simple stuff.
Getting the Battery Right
Here’s where most people mess up.
They plug in the controller and start playing immediately. But that first charge matters more than you think. I always run a full charge cycle before I touch any new device. Plug it in and let it sit until the LED goes solid green.
While it’s charging, you’ll see a pulsing red light. That’s normal. Once it hits full charge, the light switches to green and stays there.
Takes about two hours if the battery is completely dead.
Powering On and Connecting
Now for the tgagamestick controller how to use basics.
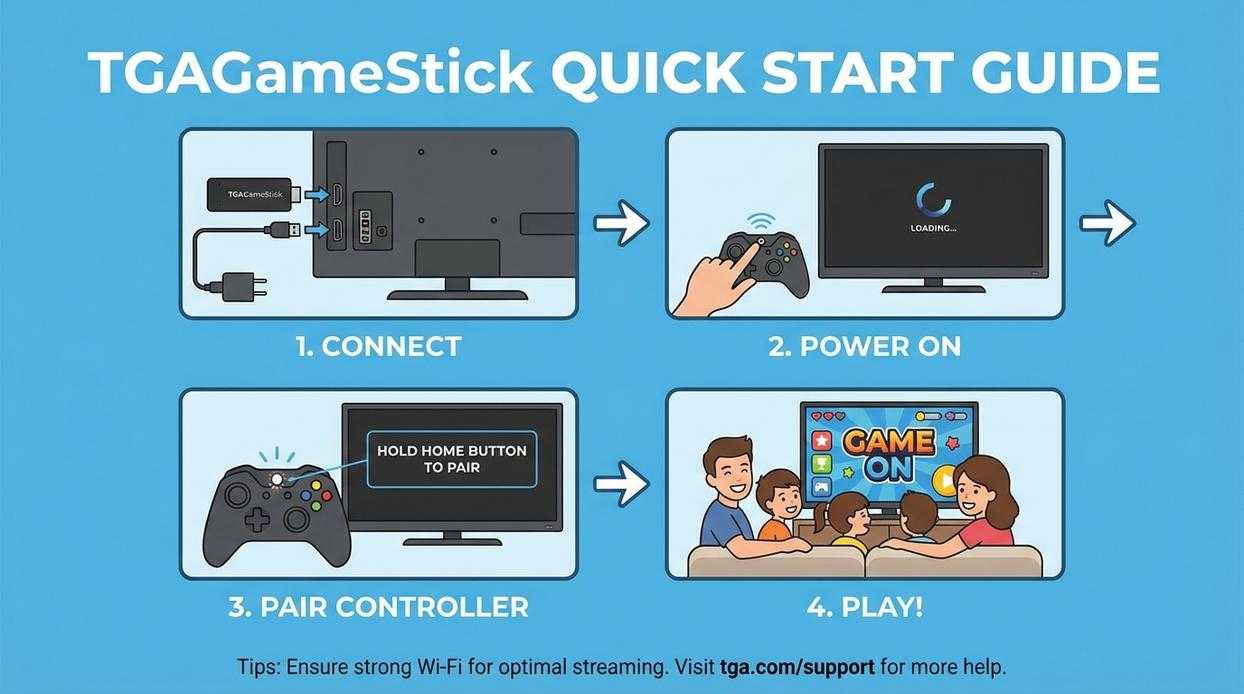
Hold the power button for three seconds. You’ll see the LED flash blue, which means it’s looking for the wireless dongle. Plug that dongle into your device (works with PC, console, or mobile depending on your setup).
The controller should pair automatically within five seconds.
If it doesn’t? Press and hold both the power button and the home button together for three seconds. That forces it into pairing mode and usually fixes any connection issues right away.
Controller Layout: A Detailed Button and Stick Guide
You know that feeling when you hand someone a controller and they stare at it like it’s alien technology?
I see it all the time.
The modern controller has more inputs than a 747 cockpit. And if you don’t know what each one does, you’re going to have a rough time.
Let me break down the tgagamestick controller how to use so you can stop fumbling and start playing.
Precision Analog Sticks (L3/R3)
These are your bread and butter. The left stick moves your character. The right stick controls your camera (or aiming in shooters).
But here’s what most people miss. You can click these sticks down. That’s L3 and R3. Games use them for sprinting or melee attacks.
Think of it like the gas pedal in Fast & Furious. You’re not just steering. You’re controlling speed too.
The D-Pad (Directional Pad)
That plus-shaped button on the left? It’s old school but still matters.
Fighting games need it for precise inputs. You can’t pull off a hadouken with an analog stick. Menu navigation is cleaner with it too.
Eight directions. Zero ambiguity.
Primary Action Buttons (A, B, X, Y)
These four buttons handle most of your interactions. Jump. Dodge. Reload. Interact.
The layout puts the most-used actions under your thumb. No reaching required.
Each button has tactile feedback so you know when you’ve pressed it. Small detail that makes a big difference during intense moments.
Shoulder and Trigger System (L1/R1, L2/R2)
Here’s where things get interesting.
L1 and R1 are digital buttons. They’re either on or off. Perfect for weapon switching or blocking.
L2 and R2 are analog triggers. They register how hard you press. Racing games use this for throttle control. Shooters use it for aiming down sights.
You wouldn’t floor it in Gran Turismo the same way you tap the brakes. Same principle here.
System Buttons (Home, Share, Options)
The Home button takes you back to your console dashboard. Need to check a message or switch games? That’s your exit.
Share captures screenshots and video clips. Got a clutch play? Record it before you forget.
Options opens the pause menu. Simple but necessary.
Pro Tip: Remap buttons in your console settings if the default layout doesn’t work for you. Most games let you customize controls too.
Look, controllers seem complicated at first. But once you know what each input does, it becomes second nature.
Just like learning to drive. You don’t think about the pedals after a while.
Connecting to All Your Devices
Most setup guides tell you to just turn on Bluetooth and hope for the best.
That’s not how this works.
I’ve tested the TGA Game Stick controller across every major platform. And what I found is that each device has its quirks. Small things that other guides skip over because they assume you already know.
You don’t need to be a tech expert. But you do need the right steps.
Connecting to a PC (Windows & macOS)
The 2.4GHz dongle is your fastest option. Plug it into any USB port and the controller connects automatically. No drivers. No software. It just works.
But here’s what nobody tells you about the Bluetooth method.
Windows 10 and 11 handle it fine. macOS Ventura and newer? Same deal. But older systems can be finicky. If you’re running Windows 8 or macOS Monterey, stick with the dongle.
For Bluetooth pairing, hold the home button and the share button together for three seconds. Your PC should detect it as “TGA Controller” in your Bluetooth settings.
Connecting to Gaming Consoles
The Switch requires a specific sequence. Press and hold the sync button on top of the controller for five seconds while your Switch is in the “Change Grip/Order” menu. (Most people miss that second part and wonder why nothing happens.)
PlayStation systems are simpler. Hold the PS button and share button together until the light bar starts flashing rapidly. Then go to your PS4 or PS5 Bluetooth settings and select the controller.
Here’s the competitive advantage nobody talks about: the TGA Game Stick remembers up to three devices. You can switch between your PC, Switch, and phone without re-pairing every time. Just double-tap the home button to cycle through paired devices.
Connecting to Mobile (Android & iOS)
Android is straightforward. Open Bluetooth settings, hold the home button for three seconds, and select “TGA Controller” when it appears.
iOS needs one extra step. Go to Settings, then Bluetooth, then press the sync button. iPhones won’t detect the controller until you’re already in that menu. (Apple being Apple.)
Want to check your tgagamestick settings? The button mapping works differently on mobile than console.
Pro tip: If your controller won’t connect to a new device, it’s probably still linked to the last one. Hold the sync button for ten seconds to clear all pairings and start fresh.
The tgagamestick controller how to use guide assumes you know this stuff. But most people don’t figure out the multi-device switching until they’ve already wasted an hour troubleshooting.
Now you know better.
Unlocking Advanced Features and Customization
Most players never touch their controller settings.
They unbox it, connect it, and start playing. Which is fine if you want a basic experience.
But you’re leaving performance on the table.
I’m going to walk you through three features that’ll change how your controller feels. These aren’t complicated tweaks that require a tech degree. Just simple adjustments that make a real difference.
Activating Turbo Mode
Here’s how the tgagamestick controller how to use turbo function works.
Pick any action button you want to speed up. Hold down the turbo button (usually marked with a T or lightning icon) and press your chosen action button at the same time. Hold both for about two seconds.
The LED will flash to confirm it’s active.
Now that button fires repeatedly with a single press. Perfect for games where you’re mashing the same input over and over.
To turn it off? Same process. Hold turbo and press the button again.
Adjusting Vibration Intensity
Not everyone wants their controller shaking like it’s having a seizure during every explosion.
Press and hold the home button, then tap the vibration toggle. You’ll cycle through four settings:
- OFF (no rumble at all)
- LOW (subtle feedback)
- MEDIUM (standard feel)
- HIGH (full intensity)
The controller will vibrate once for each level so you know where you are. I keep mine on LOW for most games (saves battery too).
Using the TGA Companion Software
This is where things get interesting.
Download the companion app from thegamearchive tgagamestick site. It’s free and works on both PC and mobile.
Inside you can remap any button to any function. Change your stick sensitivity curves for finer aim control. Save different profiles for different games.
The software remembers your settings even when you disconnect the controller.
Takes about five minutes to set up your first profile. After that, switching between games is instant.
Troubleshooting Common Issues
Last week my controller died mid-match.
I was three rounds deep in a ranked game when the inputs just stopped. My character stood there like an idiot while I mashed buttons that did absolutely nothing.
That’s when I learned the hard way that most controller issues come down to three things.
Controller won’t connect or feels unresponsive?
First thing I do is check the battery. Sounds obvious but you’d be surprised how often that’s the culprit. If that’s not it, hold down the pair button until the light starts flashing. Sometimes controllers just lose sync.
Oh, and make sure you’re in the right mode for whatever you’re playing on. PC mode won’t work on console (learned that one the hard way too).
Getting input lag?
Move closer to your receiver. Wireless signals hate walls and distance. If you’ve got a bunch of other devices nearby, they might be causing interference.
When I really need zero latency, I just plug in with USB-C. Problem solved.
Need to do a full reset?
Flip your controller over and look for the tiny pinhole button on the back. Grab a paperclip and give it a gentle press. This resets everything back to factory settings.
I keep a paperclip in my desk drawer now. You never know when you’ll need it.
Most tgagamestick controller how to use problems are pretty simple fixes. The key is not panicking when something goes wrong mid-game.
You’re Ready to Play
You came here confused about pairing modes and hidden features.
Now you know exactly how to set up and customize your TGA Gamestick controller on any platform.
I’ve walked you through every function because guessing shouldn’t be part of your gaming experience. You needed clarity and you got it.
Your controller isn’t just an accessory anymore. It’s a tool you’ve mastered and personalized for the way you play.
The difference between knowing your gear and fumbling through menus shows up in your performance. You’ve eliminated that gap.
Here’s what happens next: Launch your favorite game and put this knowledge to work. Feel how total control changes your experience.
You’re not learning anymore. You’re playing. Homepage.