I’ve seen too many players blame their aim when the real problem is sitting in their controller settings.
You’re probably here because your TGA controller doesn’t feel quite right. Maybe your shots are landing just off target. Maybe the sticks feel too loose or too stiff. Or maybe you just unboxed it and you’re staring at a wall of settings wondering where to start.
Default settings are built for the average player. And you’re not average.
I’ve spent countless hours testing every tgagamestick settings option across different platforms and game types. Fighting games need different configs than shooters. Battle royales need different setups than racing games.
This guide walks you through everything. Initial connection. Stick sensitivity. Trigger dead zones. Button mapping. The stuff that actually changes how your controller responds.
We tested these configurations in real matches. Not in menus. We know which settings make a difference and which ones you can ignore.
You’ll learn how to tune your controller so it responds exactly how you want it to. No lag between what you think and what happens on screen.
By the end, your controller will feel like it’s reading your mind. Not fighting against it.
First-Time Setup: Connecting and Driver Installation
Getting your controller connected shouldn’t feel like solving a puzzle.
But I’ve seen too many people give up in the first five minutes because the process feels confusing. They unbox their new controller, plug it in, and nothing happens. Or worse, it connects but half the buttons don’t work.
Here’s what actually matters.
Wired vs. Wireless: Pick Your Method
Wired is simple. Plug the USB cable into your controller and your device. That’s it.
Wireless takes an extra step but gives you freedom to move around. You’ve got two options here.
Bluetooth pairing works if your device has Bluetooth built in. Put your controller in pairing mode (usually by holding the sync button for three seconds). Then go to your device’s Bluetooth settings and select the controller when it appears.
USB dongle is your backup plan. Some controllers come with a dedicated wireless adapter. Just plug it into a USB port and the controller connects automatically. No pairing needed.
Some people say wired is always better because of input lag. But modern wireless tech? The difference is barely noticeable unless you’re competing at a professional level.
Platform-Specific Recognition
Windows usually picks up controllers right away. You’ll see a notification in the bottom right corner.
macOS can be pickier. Go to System Preferences and check under Bluetooth or Game Controllers to confirm it’s there.
PlayStation and Xbox have their own quirks. PS5 controllers work great on PlayStation but need extra software on PC. Xbox controllers play nice with Windows (Microsoft owns both) but might need updates on other platforms.
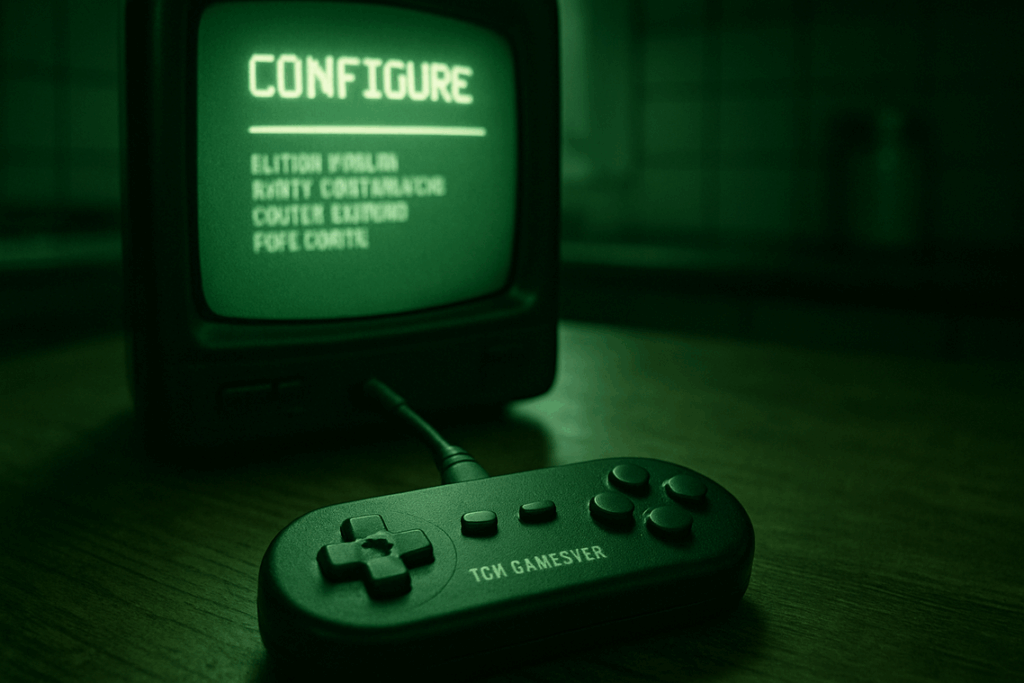
The tgagamestick settings menu is where you’ll verify everything once the hardware connects.
Do You Need Drivers?
Most modern controllers work out of the box. But “work” and “work PROPERLY” are different things.
Check the manufacturer’s website. Look for a support or downloads section. If there’s official software available, grab it. This unlocks features like button remapping and vibration control.
Pro tip: Write down your controller’s model number before you start searching. Saves you from downloading the wrong files.
Quick Verification Test
Open any game or use your system’s controller test utility.
Press each button. Move both sticks in full circles. Check if the triggers register.
Takes thirty seconds and saves you from troubleshooting mid-game later.
Mastering the Configuration Software
Most setup guides skip the part that actually matters.
They’ll tell you to download the software and click a few buttons. But they won’t show you how to make the TGA controller work the way you actually play.
I’m going to change that.
Downloading and Installing the Utility
Head to the official tgagamestick support page. You want the configuration utility that matches your controller model.
Download it. Run the installer. Connect your controller via USB.
That’s it for the basics.
Interface Overview
When you open the software, you’ll see four main sections.
Profile Management sits at the top. This is where you’ll create and switch between different setups. Button Mapping takes up the left side of the screen. Click any button to reassign it.
Stick and Trigger Settings are in the center. You can adjust sensitivity curves and dead zones here (something most players never touch but should). Vibration Control is at the bottom right.
Here’s what other guides won’t tell you. The default tgagamestick settings are designed for casual play. If you’re serious about performance, you need to build your own profiles.
Creating Your First Profile
Click the plus icon in Profile Management.
Name it something specific. “Shooter” or “Racing” works, but “Apex Legends” or “Forza” is better. You’ll remember what each profile does when you have ten of them saved.
Now map your buttons. I start with the face buttons because that’s where muscle memory lives. Then I move to triggers and bumpers.
The difference between a shooter profile and a racing profile? Trigger sensitivity. Shooters need a hair trigger. Racing games need gradual acceleration control.
Saving and Loading Profiles
You have two options here.
Save to the controller’s onboard memory if you play on multiple systems. The controller remembers up to three profiles this way. Save to your computer if you want unlimited profiles but only play on one setup.
I do both. My main three profiles live on the controller. Everything else stays on my PC as backup files.
Core Configuration: Custom Button Mapping
You just got your controller. Now you want to make it actually work the way you play.
The mapping interface is simpler than you’d think. Open your tgagamestick settings and you’ll see a visual layout of every button. Click the one you want to change. That’s it.
Standard remapping is where most people start.
Say you’re coming from Xbox and the PlayStation layout feels backwards. Swap X and O. Takes about ten seconds. I do this for every action game I play because my muscle memory refuses to cooperate otherwise.
For shooters, try swapping your crouch and melee buttons if you find yourself accidentally punching walls during firefights (happens more than you’d think).
Here’s where it gets interesting.
Macros let you record a sequence and trigger it with one press. Fighting game player? Record that quarter-circle motion plus three button combo and assign it to a single trigger. You’ll still need skill to know when to use it, but your execution becomes consistent.
I recommend keeping macros simple. Three to four inputs max. Anything longer and you lose the timing flexibility you need to adapt mid-match.
Special functions are underrated.
You can map volume controls directly to your D-pad. No more fumbling for your headset during intense moments. Screenshot capture goes on an unused button combo so you can grab that perfect victory screen without pausing.
The tgagamestick controller release date brought these features standard, which honestly should’ve been industry norm years ago.
My advice? Start with one change. Play for a few hours. Then adjust again. Don’t rebuild your entire layout at once or you’ll just confuse yourself.
Advanced Tuning: Sticks, Triggers, and Vibration
Most players never touch their controller settings.
They play with whatever came out of the box and wonder why their aim feels off or why their character keeps drifting to the left.
Here’s what I learned after years of testing different configurations. The default settings work for maybe 30% of players. The rest of us? We’re fighting our controllers instead of working with them.
Some people argue that messing with sensitivity curves and deadzones is overkill. They say if you’re good enough, the settings don’t matter. Just adapt and play.
But that’s missing the point entirely.
Your controller should match how you play. Not the other way around.
Let me break down what actually matters when you dig into tgagamestick settings.
Sensitivity curves change how your analog sticks respond to movement. Linear means consistent speed throughout the entire range. Move the stick halfway and you get exactly half the maximum turn speed. Aggressive curves ramp up fast, giving you quick movements with small inputs (great for twitchy shooters). Smooth curves ease into motion, which helps with precision aiming.
I use aggressive for fast-paced FPS games. Smooth for anything that needs accuracy over distance.
Deadzones are the invisible zones around your stick’s center position. If your character moves when you’re not touching the controller, that’s stick drift. You fix it by increasing the deadzone slightly. But go too far and your inputs feel sluggish because the stick has to travel further before anything happens.
The sweet spot? Just enough to stop drift without adding noticeable lag.
Trigger actuation points determine how far you need to pull before the game registers your input. Shorter stops mean faster shots in competitive shooters. Full range gives you precise throttle control in racing games or smooth acceleration in flight sims.
Most modern controllers let you adjust this. Use it.
Vibration motors sit on each side of your controller. You can dial down the intensity or turn them off completely. I keep mine at about 60% because full strength gets distracting during long sessions. Some competitive players disable it entirely to eliminate any interference with their grip.
Test what feels right for you. Your hands will tell you.
Troubleshooting Common Configuration Problems
Your controller’s acting up and you just want to play.
I’ve been there. You’re ready to jump into a session and suddenly nothing works. The software won’t detect your controller or your settings vanish every time you restart.
Here’s what actually fixes these problems.
Controller Not Detected by Software
Start with the basics. Check your USB cable or wireless dongle. I know it sounds obvious but loose connections cause half the detection issues I see.
Run the software as an administrator. Right click the icon and select “Run as administrator.” Windows sometimes blocks normal access to controller hardware.
Still nothing? Reinstall your drivers. Go to Device Manager, find your controller, uninstall it, then plug it back in. Let Windows reinstall everything fresh.
Settings Not Saving to the Controller
This one trips people up constantly.
There’s a difference between saving to a local profile and saving to onboard memory. Local profiles live on your PC. Onboard memory stays in the controller itself (so your tgagamestick settings travel with you to other systems).
Look for two different buttons. One says “Apply” and updates your current session. The other says “Sync to Device” or “Save to Controller.” You need that second one if you want settings to stick.
Input Lag or Unresponsive Controls
Switch from Bluetooth to wired. Bluetooth adds latency. Always. If you’re using wireless, at least use the included dongle instead of your PC’s built-in Bluetooth.
Close background apps. Discord, Chrome with 50 tabs, that game launcher you forgot about. They all eat resources.
Check for firmware updates in your controller software. Manufacturers fix input lag issues all the time through updates.
How to Perform a Factory Reset
Last resort time.
Most controllers have a small reset button on the back. You’ll need a paperclip. Hold it for 10 seconds while the controller is plugged in.
No reset button? Open your controller software and look for “Restore Factory Settings” or “Reset to Default.” This wipes everything clean and often fixes weird glitches that nothing else will touch.
Just remember you’ll need to reconfigure all your tgagamestick controller how to use settings from scratch.
Your Controller, Your Rules
You came here to take control of your setup.
Now you know how to configure your TGA game controller from the ground up. Basic setup to expert tuning.
No more fighting with default settings that don’t match how you play. Those factory presets weren’t built for you.
Custom profiles change everything. When you dial in your sensitivity and button mapping, your hardware works with you instead of against you. Better performance and comfort follow.
Here’s what matters now: Load up your favorite game and feel the difference.
Your tgagamestick settings are dialed in. Your controller responds the way you want it to. That’s the advantage you’ve been missing.
Go play. Homepage.